Quickstart
Go from zero to generated code in under 5 minutes. This guide walks you through creating your first project and generating production-ready code.
Prerequisites
Before you begin, make sure you have:
- A modern web browser (Chrome, Firefox, Safari, or Edge)
- An email address to create your account
Info
1. Create an account
Head to the signup page and create your free account. You can sign up with email or use GitHub/Google authentication.
2. Set up your organization
After signing up, you'll go through the onboarding flow to create your organization.
Organization name
Name your workspace (e.g., 'My Company', 'Personal Projects'). Organizations help you manage multiple projects and collaborate with team members.
First project
You'll be prompted to create your first project right away. Give it a name and select your target frameworks.
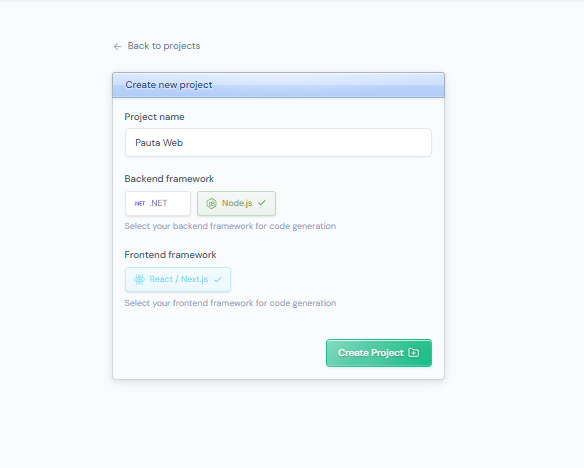
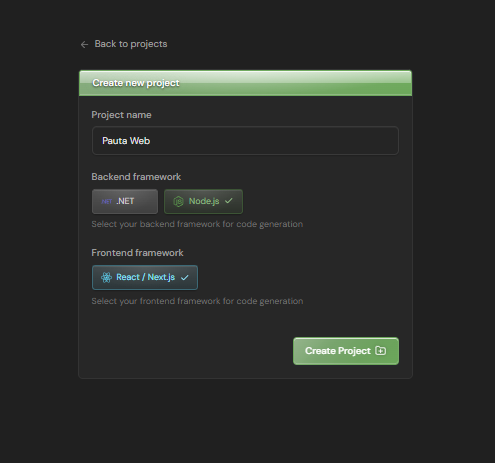
3. Create a project
Give your project a name and select your target frameworks (backend and optionally frontend).
4. Design your schema
Open the visual editor and start designing your domain model.
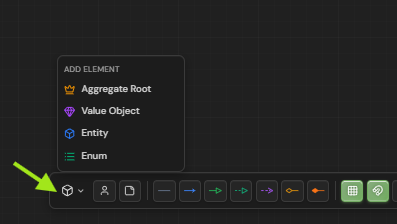
Create a new entity
Click the cube icon in the bottom toolbar to create a new entity. For example, you could name it 'User' or 'Product' depending on your domain.

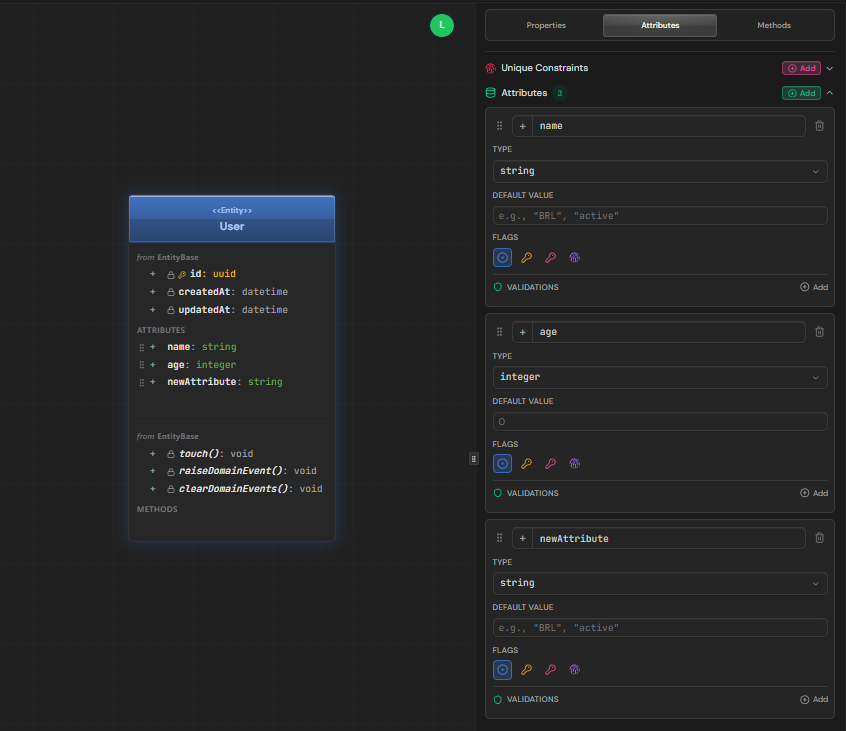
Add attributes and methods
Add attributes and methods directly on the entity card or use the properties panel on the right sidebar. Double-click on any attribute or method name to edit it inline. Each attribute has a name, type, and visibility.
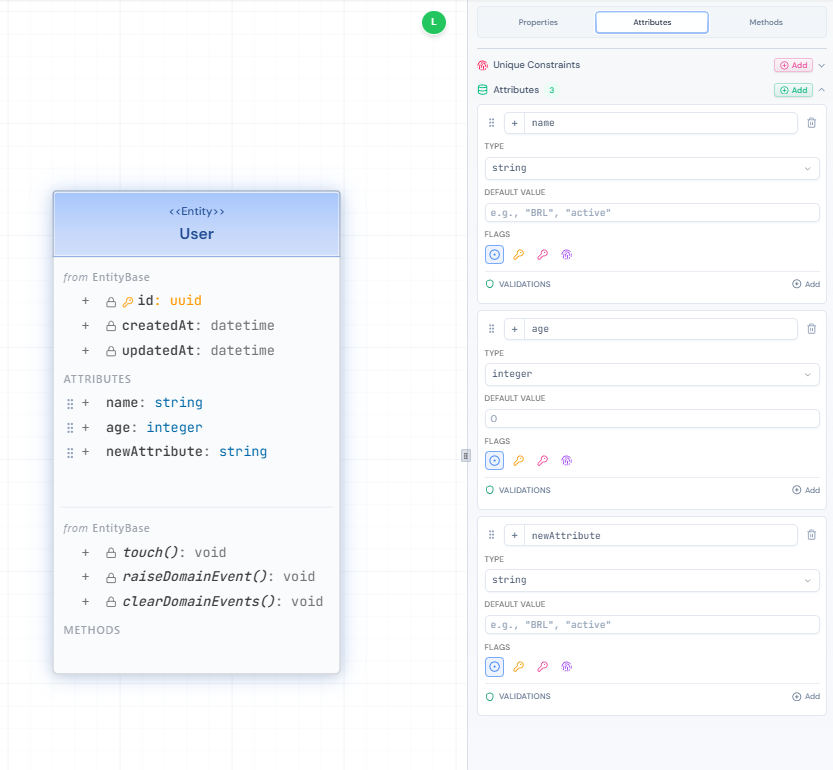
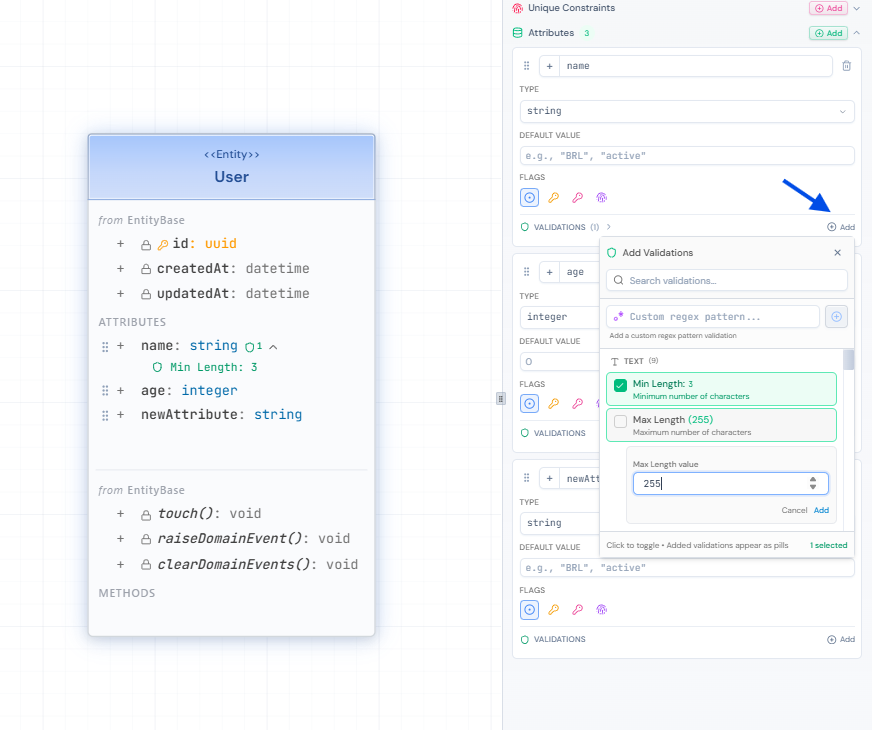
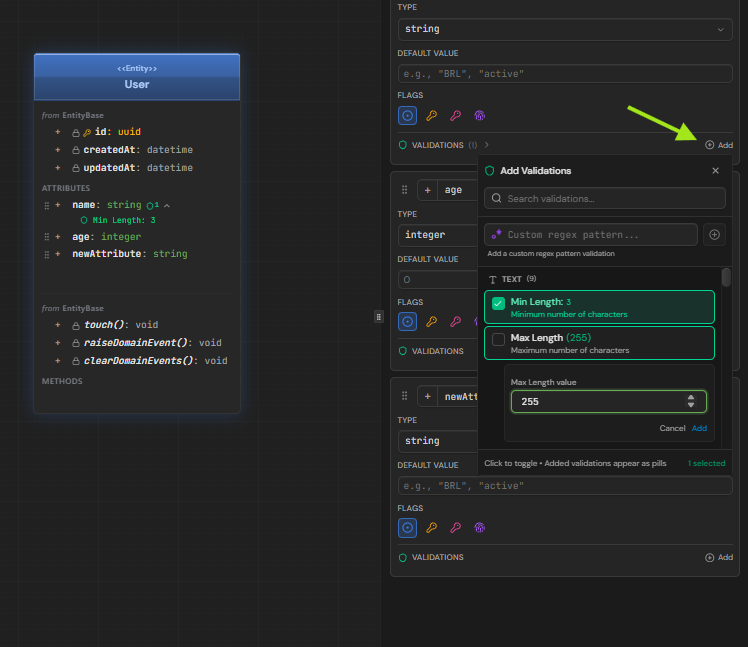
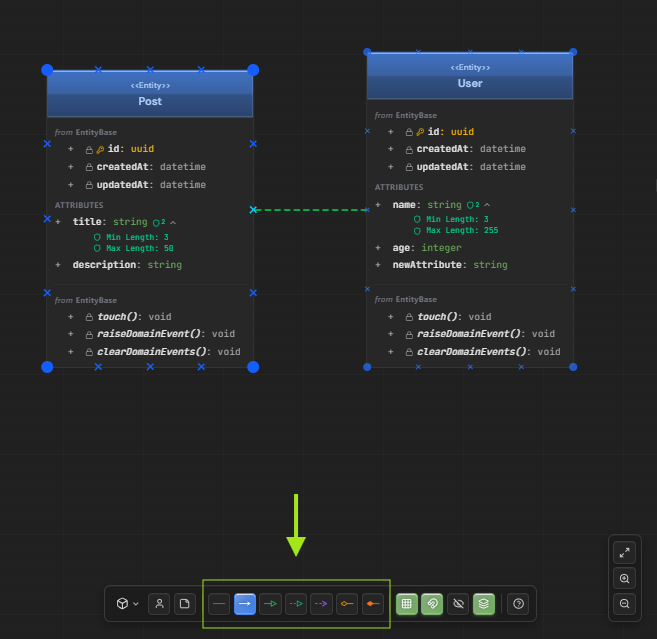
Set validations
Select an attribute and configure validation rules in the properties panel. You can set constraints like required, min/max length, email format, regex patterns, and more.
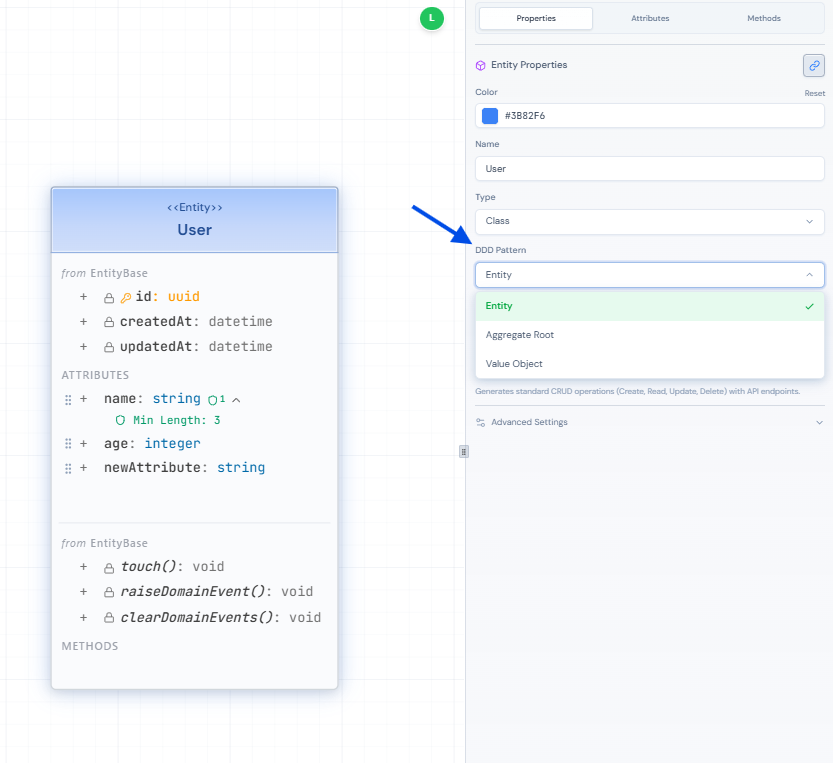
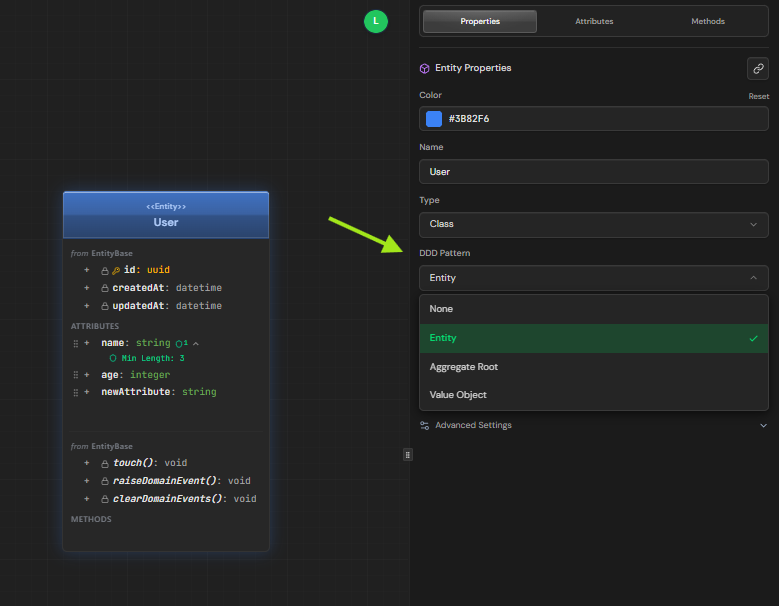
Configure DDD type (if needed)
Entities are created with a default DDD type, but you can change it in the properties panel. Choose from Aggregate Root, Entity, Value Object, Enum, or Interface depending on your domain model needs.
Note
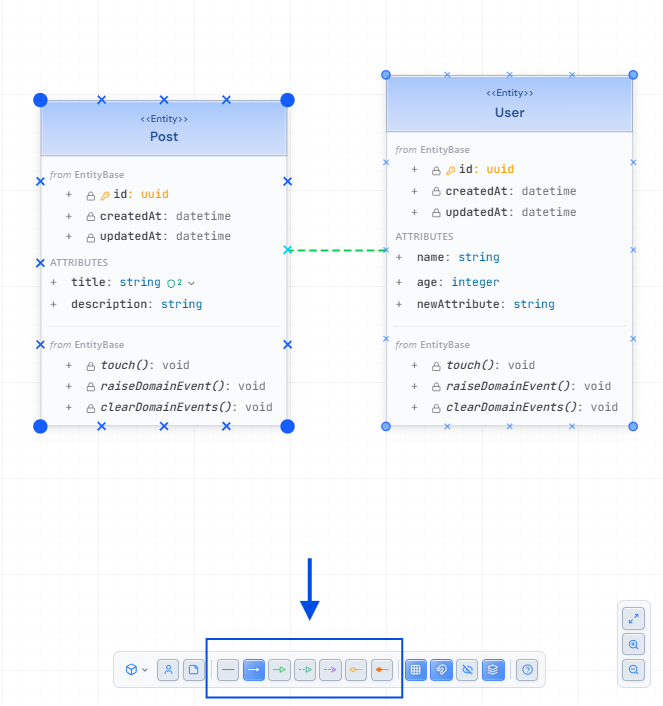
Create relationships
Create more entities and connect them by dragging from one entity to another. AeroCoding supports different relationship types like association, composition, and inheritance with configurable cardinality.
5. Generate code
With your schema ready, use the AeroCoding CLI to generate production-ready code.
Install the CLI
Install the AeroCoding CLI globally using npm:
npm install -g aerocodingAuthenticate
Login to your AeroCoding account. A browser window will open for authentication:
aerocoding loginGenerate your project
Run the create command to generate code from your schema. You'll be guided through selecting your project and architecture template:
aerocoding createUpdate when needed
After making changes to your schema, use the update command to regenerate your code. AeroCoding tracks all generated files in aerocoding-manifest.json and performs a smart merge — files you've modified won't be overwritten.
aerocoding updateWhat gets generated
Backend
- Entities, Value Objects, Enums
- Use Cases (CQRS pattern)
- DTOs and Mappers
- Repository interfaces + implementations
- REST Controllers with OpenAPI
- Database configurations (EF Core)
- Unit and integration tests
- Domain Events and Reactions
Frontend
- Typed models and interfaces
- API client with typed methods
- Data fetching hooks
- Validation schemas
- Form components
- MVVM architecture
What's next?
Congratulations! You've created your first AeroCoding project. Here are some recommended next steps: