Master the visual editor
The visual schema editor is your workspace for designing domain models. Learn the interface, navigation, and tools to work efficiently.
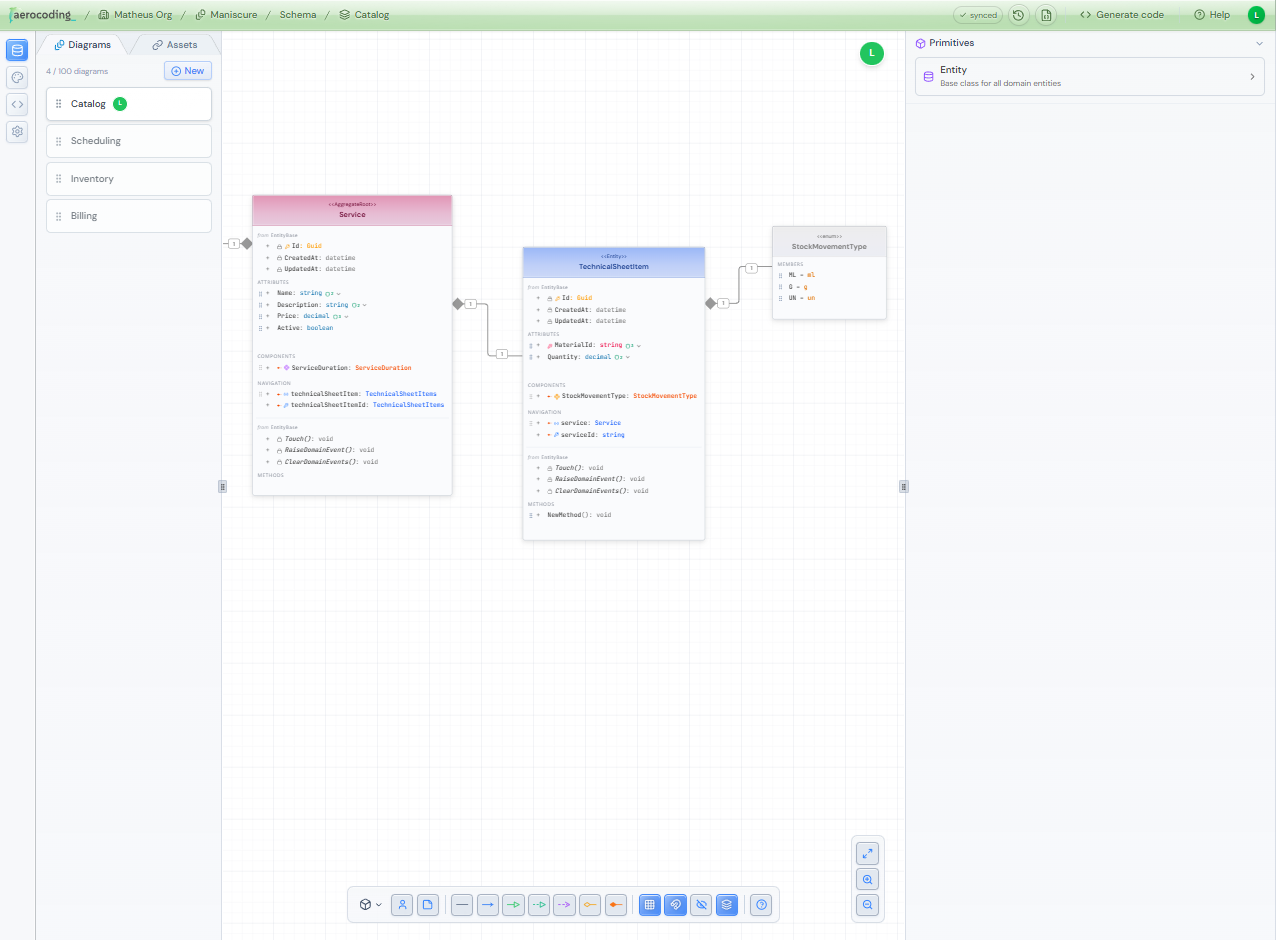
Editor interface
The editor is divided into four main areas: the canvas (center), left sidebar (diagrams and assets), right sidebar (properties), and floating toolbar (creation tools and controls).
Tip
Canvas
The canvas is your main workspace. Create entities, connect them with relationships, and organize your domain model visually.
Pan & zoom
Hold Space and drag to pan. Use scroll wheel or pinch to zoom. Click the zoom controls on the right side of the canvas for precise adjustments.
Create entities
Use the floating toolbar to add entities with specific DDD types (Aggregate Root, Entity, Value Object, Enum), or right-click on the canvas to open a context menu with creation options.
Connect entities
First select a connection type from the floating toolbar (Association, Composition, Inheritance, etc.). Then click on the source entity to see connection handles and drag to the target entity.
Multi-select
Hold Shift and click to select multiple entities, or drag a selection box around them. Move or delete them together.
Left sidebar
Navigate between diagrams and manage reusable assets from the left sidebar. The sidebar has two tabs.
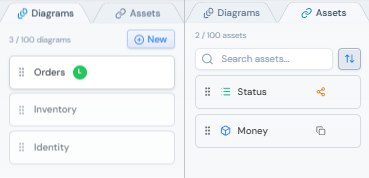
Diagrams
Switch between diagrams in your project. Add, rename, delete, and reorder diagrams. See collaboration indicators showing who's viewing each diagram in real-time.
Assets
Save entities as reusable assets and drag them onto any diagram. Search, sort, and organize your asset library. Use presets for common DDD architecture patterns.
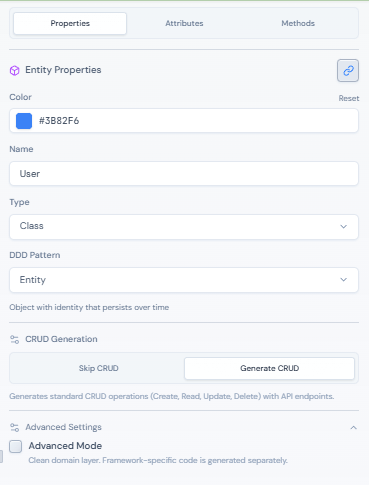
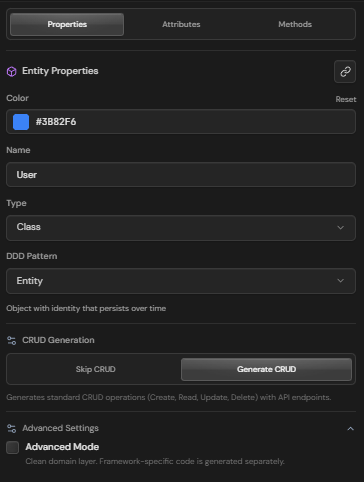
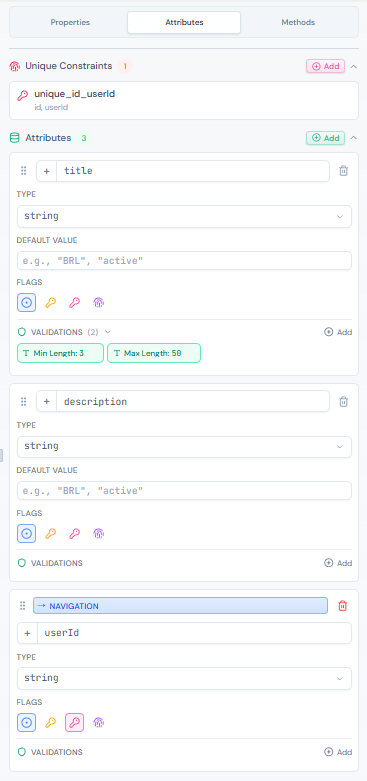
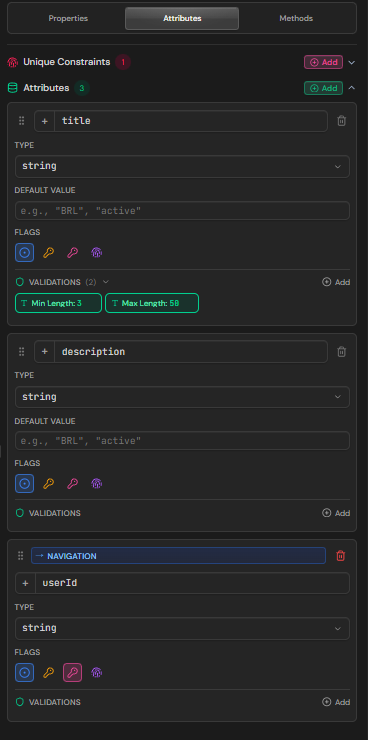
Properties panel
Select any element on the canvas to view and edit its properties in the right sidebar. The panel has three tabs for entities.
Properties tab
Edit the entity name, choose its type (Class, Interface, Enum, Record, Struct), set the DDD pattern (Aggregate Root, Entity, Value Object), configure scope (Local or Shared), and customize the header color.
Attributes tab
Add and manage attributes with type, nullable option, visibility (public, private, protected), and validation rules like required, min/max length, regex patterns, and email format.
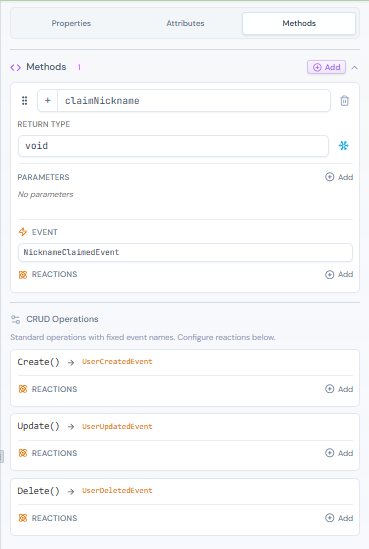
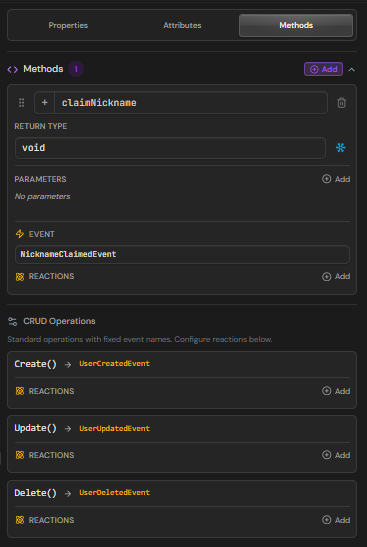
Methods tab
Define methods with parameters and return types. For Enums, this tab becomes 'Members' to manage enum values instead.
Info
Floating toolbar
The floating toolbar at the bottom center provides tools for creating elements and connections.


Add elements
Create entities with DDD types (Aggregate Root, Entity, Value Object, Enum), add Actors for user/system representation, and Notes for documentation.
Connection types
Choose from 7 UML relationship types: Association, Navigable Association (with FK), Inheritance, Implementation, Dependency, Aggregation (weak ownership), and Composition (strong ownership).
View controls
Toggle grid visibility, enable snap-to-grid, switch to read-only view mode, and show/hide base attributes inherited from BaseEntity (Id, CreatedAt, UpdatedAt).
Zoom controls
Fit all elements to view, zoom in, and zoom out. Located on the right side of the canvas.
Keyboard shortcuts
Speed up your workflow with these keyboard shortcuts.
| Shortcut | Action |
|---|---|
| Ctrl + Z | Undo |
| Ctrl + Shift + Z | Redo |
| Ctrl + A | Select all |
| Delete | Delete selected |
| Ctrl + D | Duplicate selected |
| Space + drag | Pan the canvas |
| Ctrl + scroll | Zoom in/out |
| Escape | Deselect all |
Next steps
Continue learning about specific features of the editor.